NTEGRA AURA
Scanning Probe Microscope for experiments in air, controlled environment and low vacuum.

- Single- and multi-pass techniques
- Measurement of weak forces (electrical, magnetic, mechanical, etc.)
- High sensitivity and measurement accuracy
- Thorough environment control, low vacuum
- Open architecture to enhance functionality
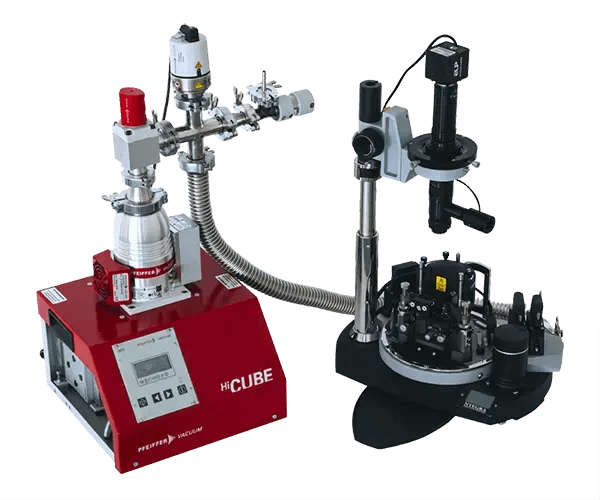
NTEGRA Aura is a Scanning Probe Microscope for experiments in air, in controlled atmosphere and in low vacuum conditions; ideal for both single- and multi-pass techniques and measurement of weak forces (electrical, magnetic, mechanical, etc.).
The Q-factor of the cantilever in vacuum increases, thus gaining the sensitivity, reliability and accuracy of “probe-sample” light forces measurements. At the same time, a shift of pressure from atmospheric one to a 10-2 Torr value provides a tenfold increase in the Q-factor. Further vacuum pumping causes the Q-factor to reach its plateau and changes insignificantly. Therefore, NTEGRA Aura offers the optimal “price/quality” ratio, as compared to high-vacuum devices. It takes only a few minutes to achieve the vacuum required for a tenfold Q-factor increase. At the same time the system is compact, easy to operate and maintain. The NTEGRA Aura has built-in closed-loop control for all the axes, an optical system with 1 µm resolution and the ability to work with over 40 different AFM techniques.
Due to open architecture, the functionality of the NTEGRA Aura can be extended significantly: to specialized magnetic measurements in an external magnetic field (horizontal, up to +/-2500 Gauss; vertical, up to +/-1100 Gauss, high-temperature experiments (heating to 150 °С with temperature maintaining precision of 0.05 °С), etc.
MEASURING MODES AND TECHNIQUES
AFM (Contact + Semi-Contact + Non-Contact)/ Lateral Force Microscopy / Force Modulation Microscopy / Magnetic Force Microscopy/ Electrostatic Force Microscopy / Scanning Capacitance Force Microscopy/ Kelvin Probe Force Microscopy / Piezoresponce Force Microscopy/ Spreading-Resistance Imaging / STM / Lithography: AFM (Force + Voltage + Current), STM


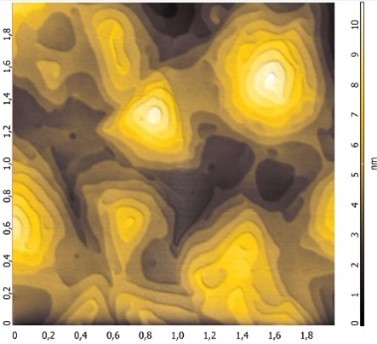
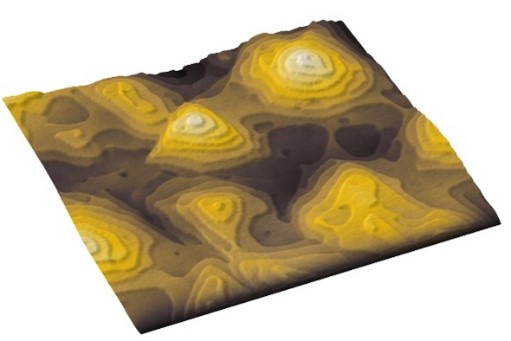
BiSbTeSe2 epitaxial film on Si.
Image size: 2×2 µm
Sample courtesy: Ishchenko D.V., Rzhanov Institute of Semiconductor Physics.
APPLICATIONS
• Materials science: electrical, magnetic and mechanical properties
• Chemically sensitive samples
• Polymers and thin organic films
• Nanomaterials and nanostructures
• Nanomachining/nanomanipulations
TECHNICAL DATA
| Scan type | Scanning by sample | Scanning by probe* | |
| Sample size | Up to 40 mm in diameter, up to 15 mm in height |
Up to 100 mm in diameter, up to 15 mm in height |
|
| Sample weight | Up to 100 g | Up to 300 g | |
| XY sample positiniong | 5×5 mm | 5×5 mm | |
| Positioning resolution | 5 µm | 5 µm | |
| Scan range | 100x100x10 um Up to 200x200x20 µm (DualScan mode) |
100x100x10 um Up to 200x200x20 µm (DualScan mode) |
|
| Non linearity, XY (with closed loop sensors) |
≤ 0.1% | ≤ 0.15% | |
| Noise level, Z (RMS in bandwidth 1000 Hz) |
With sensors | 0.04 nm (typically), ≤0.06 nm |
0.06 nm (typically), ≤0.07 nm |
| Without sensors | 0.03 nm | 0.05 nm | |
| Noise level, XY (RMS in bandwidth 200 Hz) |
0.2 nm (typically), ≤0.3 nm (XY 100 um) |
0.2 nm (typically), ≤0.3 nm (XY 100 um) |
|
| Optical viewing system | Optical resolution | 1 um | 3 um |
| Field of view min | 0.4×0.3 mm | 0.5-0.4 mm | |
| Field of view max | 4.9×3.7 mm | 6.5×4.9 mm | |
| Continuous zoom | available | available | |
| Environment control | air humidity control gas atmosphere vacuum measurement |
air humidity control gas atmosphere vacuum measurement |
|
| Vacuum system | Pressure | 10-2 Torr | 10-2 Torr |
| Electrochemical measurements** | available | available | |
| Vibration isolation | Active | 0.7-1000 Hz | 0.7-1000 Hz |
| Passive | above 1 kHz | above 1 kHz |
* The scanning head can be used as a stand-alone device for measuring specimens of any sizes
** Option
KEY FEATURES
Experiments in a controlled environment
NTEGRA Aura is intended for SPM experiments in low vacuum and in a controlled environment.
Multifunctionality
NTEGRA Aura realizes more than 40 Scanning Probe Microscopy (SPM) techniques, including spectroscopy and lithography. It is an ideal tool for investigating physical and chemical properties of samples thoroughly with the highest possible precision and performing high-resolution scans.
Light forces measurements
In vacuum, the cantilever Q-factor increases, thus the sensitivity, accuracy and reliability of the light force measurements between the probe and the sample also increase. It is especially important for noncontact modes, such as Magnetic Force Microscopy, Electrostatic Force Microscopy and Scanning Capacitance Microscopy. Switching from atmospheric pressure to a 10-2 Torr vacuum provides a ten-fold increase in the Q-factor.
Precise and accurate
Prima has built-in closed-loop capacitive sensors for all axes (X, Y, Z). These sensors measure the actual scanner displacement and compensate for parasitic piezoceramics properties including non-linearity, hysteresis and creep with extremely low noise level. This enables closed-loop control on the small fields – just what you need for precise lithography with perfect and accurate linearity.
Modular design
The NTEGRA is designed with an open hardware and software architecture. This allows various compatible assemblies and components to be used in the instrument using a simple plug&play method. Due to the modular organization, the specialization of the basic atomic force microscope can be easily changed or expanded. This design provides the unique ability to configure the instrument for specific applications and specific research techniques.
Large selection of optional features
Due to its open architecture, the functionality of the NTEGRA Aura can be significantly expanded. The modular design allows the system to be supplemented with external magnetic field measurements, sample temperature experiments, near-field optical microscopy, Raman spectroscopy, and many other options.

